The best way to learn how to use a software is to start using it. After going over the shortcuts and the workspace, it’s time to dive into when and how to use these tools in an actual drawing process. I’ll be going over how I manage layers when creating my illustrations and hopefully you can apply these strategies to your own work. This is not a “How To Draw” tutorial, rather it’s aimed more towards helping those who are new to Clip Studio to help them to get familiar with the software.
Set Up
First, I set up how big I want the canvas size to be. I usually choose a square like canvas, e.g. 2500w x 2600h and set the DPI to 300, as this will ensure a big enough canvas for a quality drawing. You can also toggle the record timelapse button on the bottom left if you want to post a speed paint. This will tell Clip Studio to start recording as soon as you start drawing, or you can also go to File → Timelapse →Record Timelapse and this will tell Clip Studio to start recording wherever you are in the drawing process. Export timelapse is right below the record timelapse.
Sketching
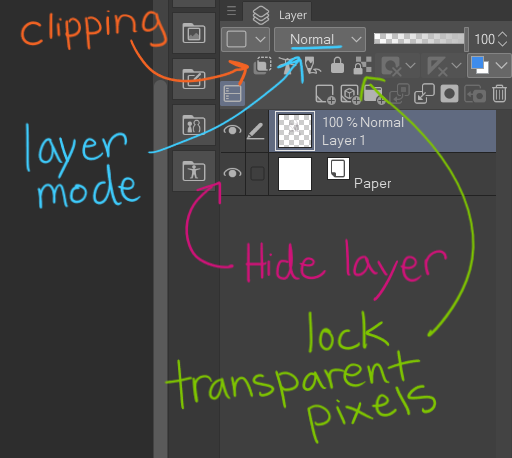
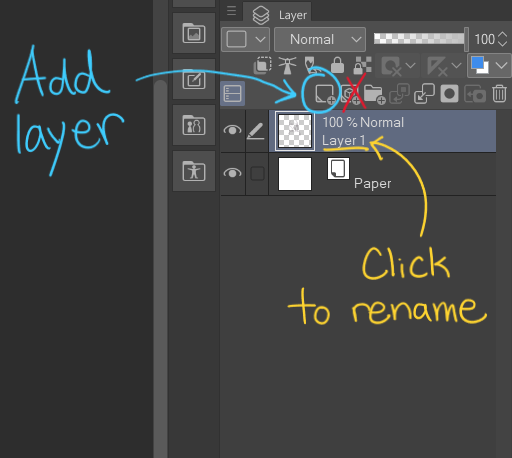
I use a hard brush such as G-pen when I do my sketches. The sketch is usually not in the final drawing so it doesn’t matter which brush you use for this stage. I always name my layers and you can do that by clicking on the “Layer #”. You can add layers by clicking “New Raster Layer”. The “Paper” layer isn’t a layer you can draw on, but you can change the color. This Paper layer is just to ensure that you have a background (which is white), if it’s deleted or hidden, you’ll have a transparent bg.
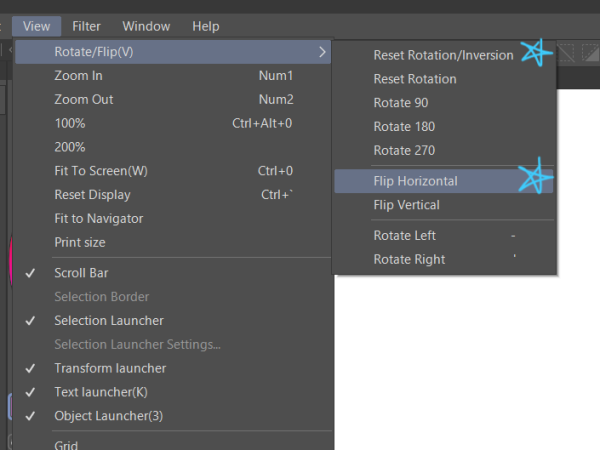 Pro tip: When you are staring at your drawing for a long time, you might not catch the errors then if you were to look at it with fresh eyes. An easy way to solve this, we can look at the drawing from a different angle by flipping the canvas horizontally. To flip the canvas horizontally go to View →Rotate/Flip →Flip Horizontal. If you find the white canvas to be eye straining, you can change the Paper layer color to a gray color.
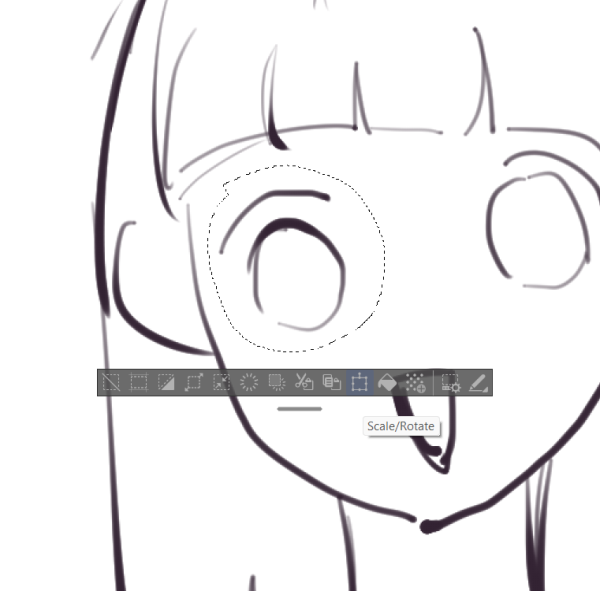
In this stage I go between the brush and eraser a ton until I get what I like. Perhaps you end up liking an eye you drew, but you drew it too low on the face. To fix this, click M to toggle the selection tool and choose “lasso”. Select the eye by drawing by drawing a close shape around the eye and when you are happy with the selection select scale/rotate. You can scale, rotate, and move the eye to where you want it to be, press ok to confirm the new position and hit deselect.
Line Art
After the sketch I make a new layer on top of the sketch and turn the sketch opacity down to 10-20%. On the new layer which I name “Line Art” I trace over the sketch with a hard brush using a dark color. It’s easier to keep the line art clean so the coloring process will be easier. After I’m done with the line art, I hide the sketch layer by clicking the eye.
Sometimes I use the liquify tool by pressing “j” which allows me to bend my drawing to however I like. A lot of artists use this tool at whatever stage they are in, but it’s important to note that the more you use it the more blurry the drawing becomes.
We can make the line art process a little bit easier by toggling “R” to rotate the canvas. Rotating your canvas can improve your range of motion and help you create better curves and straight lines.
Coloring
On another new layer, I start adding base colors. The line art should be on top of everything else, you can change the order of the layer by clicking on the layer and dragging it above or below other layers.
I usually start filling the base color of the skin, but you can go in whatever order you prefer. There are multiple ways to fill in the base color, but I find it easiest to use the bucket tool (press G twice) especially if you have clean line art. If you don’t have line art or clean line art, you can color it manually by increasing the brush size, or you can trace the drawing and use the bucket tool that way. This is an advantage of having clean line art, if there is an opening where the lines are not connected all the way or is too thin, the bucket tool may end up overfilling because it doesn’t know where to stop.
If your line is all connected and it’s still overfilling, make sure the fill bucket setting is on “reference for all layers”.
On another new layer, I start coloring the hair. Whichever layer on top will cover what was drawn on the layer underneath. Each “section” of the character e.g., skin, eyes, hair, t-shirt, jewelry etc., will get their own base color on their own layer.
You don’t have to waste time making everything neat. Because the skin layer is underneath the hair and t-shirt layer, you won’t see the messiness.
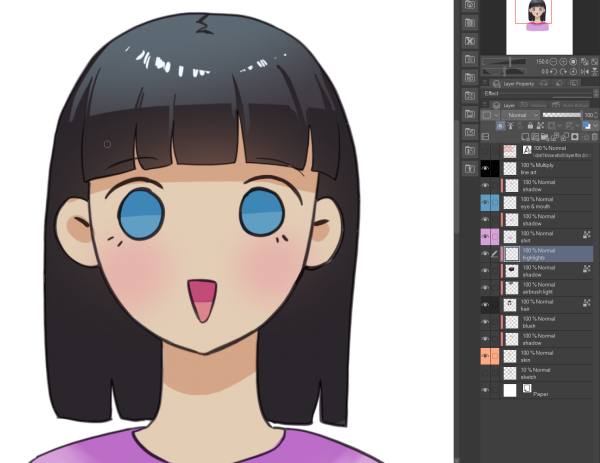
You’ll start having a lot of layers to keep track of, besides naming layers, you can also color code each layer. I mainly use this for base colors since “clipping” layers (we’ll get to that later) will have its own color, red.
Shading
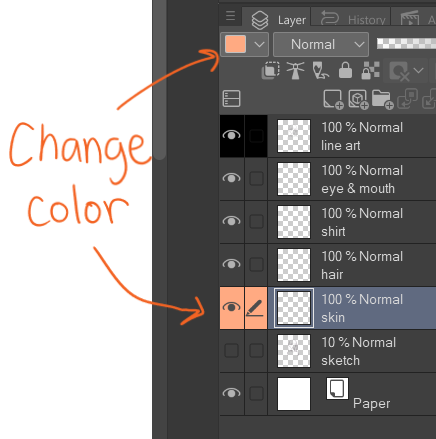
We are halfway there! After we have all the base colors filled in and they’re all in the correct spot, I make another layer on top of each base layer and set the new layers to clipping by choosing “Clip to Layer Below”. Clipping allows whatever is drawn on top to “clip” to the bottom layer.
![]()
Let’s say you’ve changed your mind and you want the hair to be black, you can toggle the “lock transparent pixel” (the smaller lock). The lock transparent pixel allows you to only draw on what you’ve already drawn on the layer. You can take a big brush and color in the new color of your choice without worrying about going over the lines. Toggle this off when you are done.
You can even add clipping layers on top of one another. Yes, there are a lot of layers. In fact, layers are probably the most utilized and powerful tool when it comes to digital art.
One of the clipping layers could be for hard shadow, another for soft shadow, another for highlights etc.
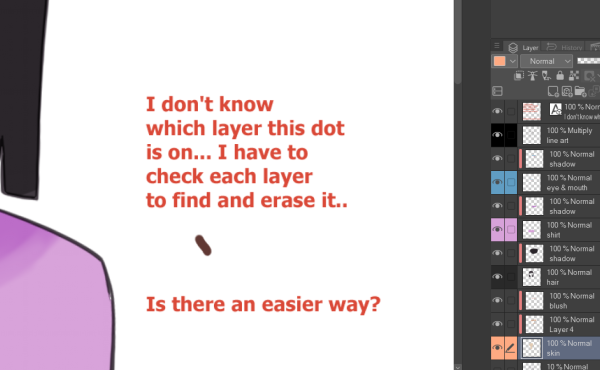
Let’s say you’ve found an error in your drawing. In the past, I would go through each layer, toggling the eye on and off trying to search for it.
In fact, there is an easier way. Just hold Ctrl + Shift and click where you need to go.
References
We’ve pretty much gone over all the essentials you need to know for making a digital illustration, but here is an extra tip. Lots of artists use references so being able to have references that you can always access is pretty useful.
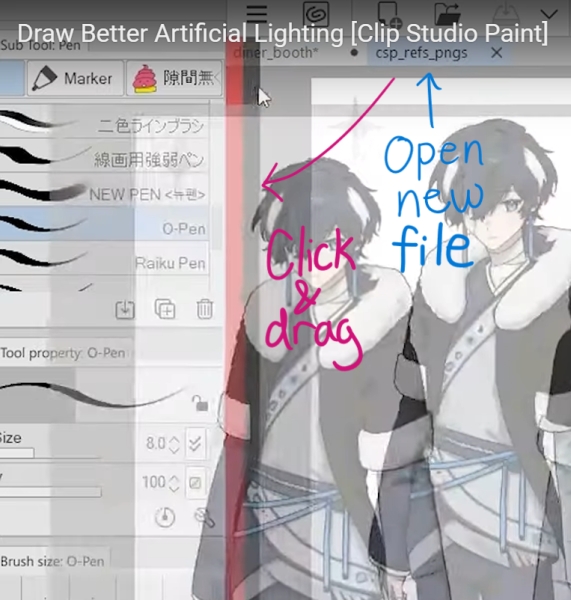
I’ve learned this tip from Oyun Orka on YouTube, this is her demonstrating how to split your screen into two. This trick allows you to see your reference without needing to flip between two canvases. You can also adjust the size by clicking and dragging the edge.
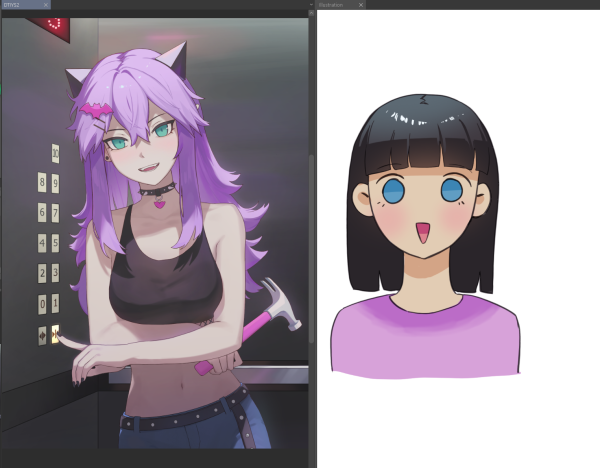
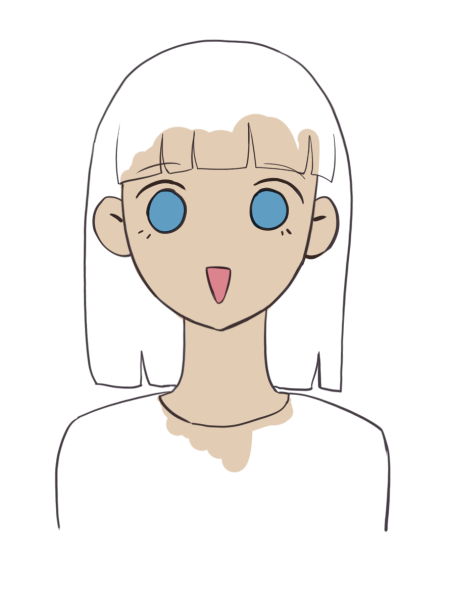
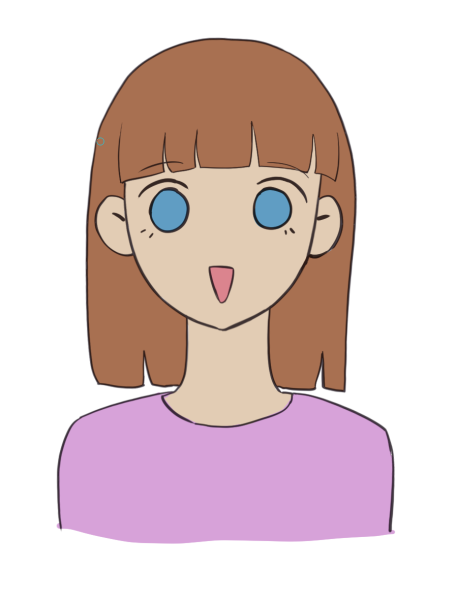
It should look like this when you split the screen. The drawing on the left is a recent drawing that I’ve done for Par0llel on Insta. For this demo, I’ve simplified things with the goofy drawing on the right, but the overall process is the same for the one on the left.
Conclusions
Of course I’ve not gone over all of Clip Studio’s features like layer modes, but you can always learn more as you progress with free sources like YouTube. If you haven’t gotten into digital art, but you want to start, Clip Studio is a great drawing software and is a one time payment for $54 unlike Photoshop that is $263.99 yearly. Hopefully you learned something from this guide. I’ve used Clip Studio only for a few months, but it was very straightforward to use and I love it.